
Windows Remote Desktop using the Windows 10 app
If not installed already, download the Microsoft RDP client from the app store (search for Microsoft Remote Desktop). Note it will nag you to sign in - you don't have to. Just cancel the sign-in dialogs and it should download anyway.
Notice that the icon is different from the 'classic' RDP client.
Configuration §
Note: in this run through we create the user account and gateway details first before setting up the PC connection. You don't have to do it this way - it just makes it slightly easier to document.
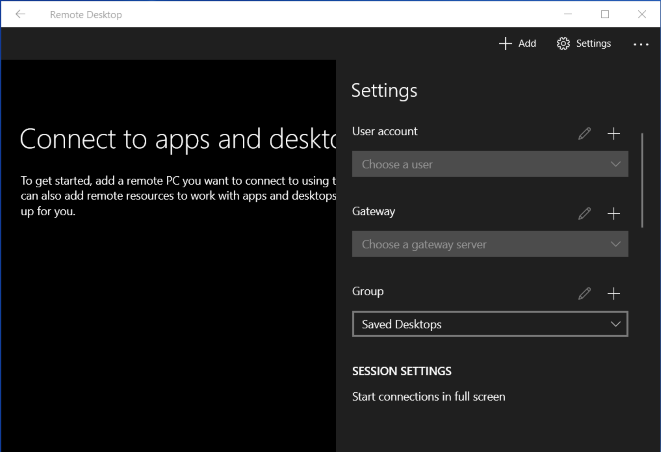
Run the RDP app and select Settings.
In the Settings list click the + next to User Account to add a user. Enter the user details. Note that for campus accounts the username can be in two forms - your email address, or CAMPUS\xxxxx (where xxxxx is the short form of your GUID). You can fill out the password, or leave it blank and enter it during the connection process. The Display name can be anything you want, or left blank.
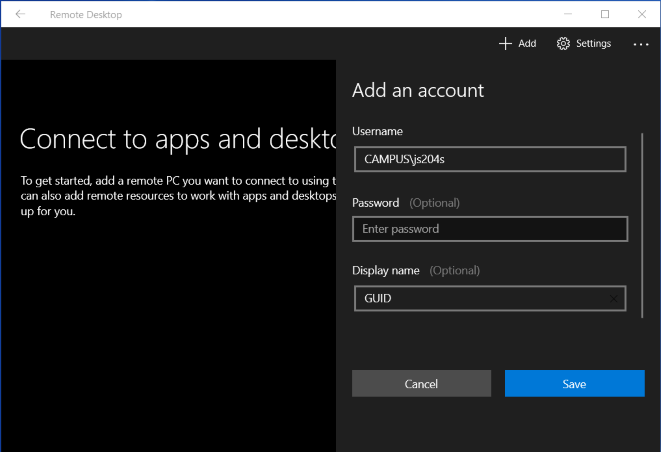
In this example we want to connect to an internal system using a GUPHYSICS user account. A second account is added with the relevant details. If you wanted to connect using a local machine account the username is in the form MACHINENAME\username. After you have done this you can see both user accounts in the drop-down, and can edit them if necessary (with the pencil icon).

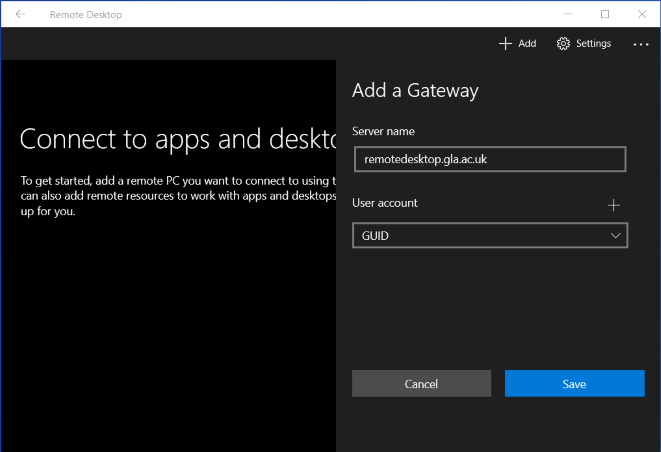
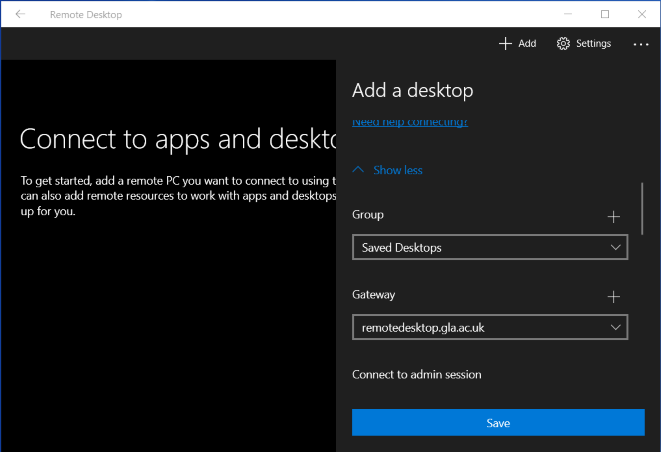
If you intend to use the RDP gateway system create a new gateway. The address of the gateway server is remotedesktop.gla.ac.uk, and you need your GUID account for this.
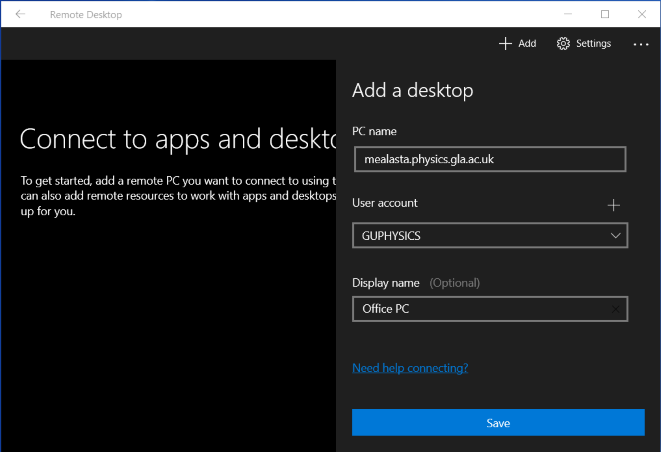
We can now set up a connection to a suitably configured target system. Click Add (beside Settings at the top of the window) and choose Desktop. Enter the address of the system (machinename.physics.gla.ac.uk or machinename.astro.gla.ac.uk etc.), the user account for this system and a Display name if desired.
There are some other settings here that apply to all connections. In particular, the setting When resizing the app: is useful. If you want the remote screen to map pixel-to-pixel on your local screen then choose Show scroll bars. If you have a high resolution local screen you may want to choose one of the stretch content options instead.
If this profile is going to use the gateway then click on Show more and choose the gateway.
There are more settings you can change here. The most useful are probably the display settings. By default (as with the 'classic' RDP client) the display size is set to the size of your local screen. If you want to change this to something different you can do this here.
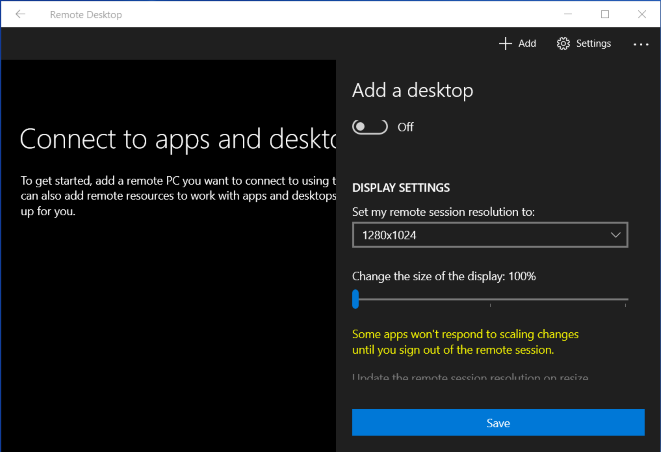
Note that the scaling can be changed here as well - this can be useful when your local system has a high-resolution screen. The effect of this setting is to make the remote system scale text and icons etc. to an appropriate value.
Another way of dealing with a local high-resolution screen is setting the remote session resolution to something sensible, and choosing one of the stretch content options (When resizing the app: in the global Settings). Always bear in mind that the smaller the remote session resolution, the more responsive the session will be.
Unlike the 'classic' client there appears to be no way to reduce the colour depth of the remote session.
Click Save to save the settings. The profile will then appear in the main window. Note that you can edit the profile via the ... menu. Confusingly, there is no Save option when you are editing an existing profile - you just click somewhere else in the window, the edit pane disappears and your changes have been made.
Usage §
Once the connection is set up we can start it. It will first connect to the gateway (if configured), and then to the target system, stopping to ask you for passwords if you didn't enter them earlier. Don't get your accounts mixed up!
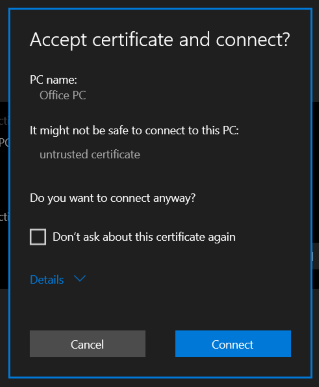
Note that when connecting to the target system you should get a certificate warning, as our Windows systems are not set up with globally trusted security certificates.
You should now see the desktop of the desired Windows system. Note that using the default connection settings this will take up the whole screen, with a small menu at the top center of the screen. If you are using a smaller remote screen then it appears in a conventional window. The way this behaves when you resize it is a bit different than the 'classic' app (and it exhibits some odd behaviour when moving it between monitors set to different scale factors...).